This guide is going to show you how to Root Samsung S22/ S22 Plus/ S22 Ultra without the need for TWRP recovery or any other custom recovery.
So if you want a superuser on your phone and also want some customization options, then rooting will be the way forward. In this tutorial, we are going to use Magisk App that will not only give us root access but also install Magisk modules that can enhance your device performance by fixing bugs, adding new features, and more.
The process will be almost the same as if we were rooting a device that had no recovery installed, but there are some differences in how Magisk installs itself on your phone. Follow these steps closely and make sure not to skip any, because skipping even one can lead to an error or other problems.
Samsung Galaxy S22 Series is a beautiful device with an incredible display and amazing battery life. However, you can make it even better by rooting your device using Magisk which does not require TWRP to be installed on the phone.
Rooting your phone allows for additional customization of the software as well as installing apps that do not come from Google Play Store. It also increases the performance of the device due to increased RAM usage after installation of custom kernel and overclocking CPU frequency, etc.
If you are ready to take advantage of all these benefits then continue reading this step-by-step guide on how to Root Samsung Galaxy S22 Series without TWRP.
About Samsung Galaxy S22
Steps to Root Samsung Galaxy S22 Series
Below I have shown step by step procedure to Root Samsung Galaxy S22 Series. You have to follow every step carefully, or else you may face trouble booting up your device again.
Please read the complete guide before applying the steps. This will avoid confusion.
Things to remember
- Make sure to disable all security Locks on your Samsung Galaxy S22.
- Take Full Backup of your Android device.
- You need a PC to perform the Commands.
- Fully charge your phone.
- Samsung Galaxy S22 Original USB Cable.
Note: Rooting is a complex process, so if you miss any of the below steps will end up bricking your device. So, make sure to follow all the steps carefully as shown.
We are not responsible for any loss and damage to your device. Apply the below steps with your own risk.
Step 1: Unlock Bootloader on Samsung Galaxy S22
- First, we need to enable Developer Options on Samsung Galaxy S22.
- Go to “Settings” on your Samsung Galaxy S22.
- Scroll down to the very bottom of the screen and select “About phone.”
- Next, select “Software information.”
- Tap on the “Build number” 5-6 times.
- Enter your phone’s lock screen PIN/Password/Pattern if prompted.
- You will now see the
"Developer mode has been enabled!"toast message on the screen.
- The next thing we need to enable is the OEM unlocking option on Samsung Galaxy S22.
- Again head over to Settings → Developer options → toggle ON the OEM unlocking option.
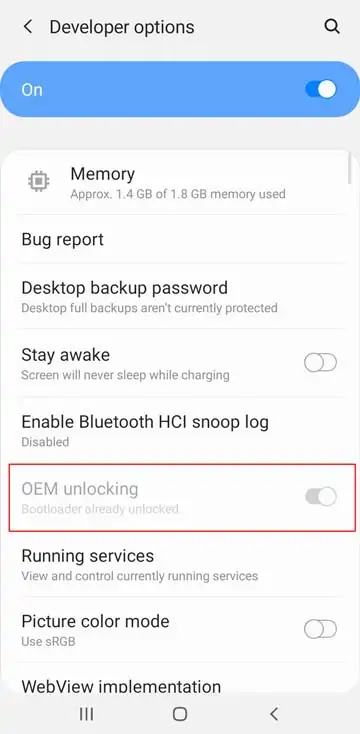
- Next select “Enable” when prompted to confirm.
- Again head over to Settings → Developer options → toggle ON the OEM unlocking option.
- Now we are ready to Unlock the Bootloader on your Samsung Galaxy S22.
- First, power off your Samsung Galaxy S22 smartphone.
- Connect your phone to the PC while holding the Volume Down + Volume Up keys together until you see the bootloader screen.
- Now press Volume Up key to enter “Device unlock mode.”
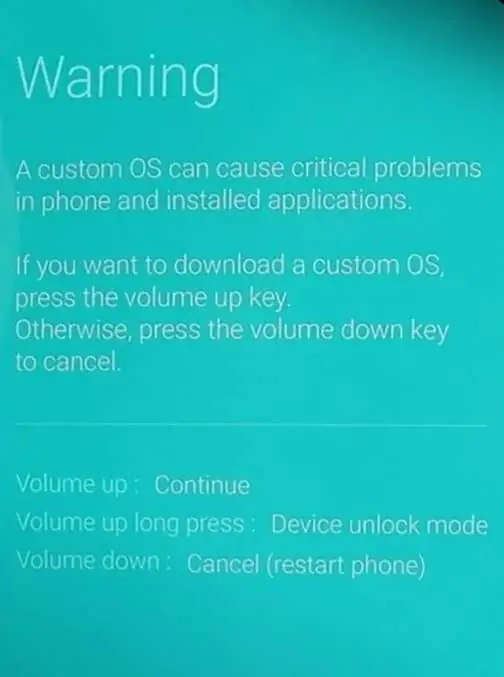
- Again press Volume Up key to confirm Bootloader Unlocking on Samsung Galaxy S22.
- Your device Bootloader is unlocked, and it should reboot automatically.
Downloads
In any steps, if the particular file is asked you to download, then you can come here and download it. We will update the links according to the latest build by developers.
- Download Magisk App (Latest Version) [Phone]
- Samsung USB Drivers (Optional) – Download [PC]
- Odin Flash Tool (Latest) – Download [PC]
- 7Zip-ZS (Latest) – Download [Install it]
- LZ4 – Download [PC] [Extract the Zip file]
Step 2: Download Stock Firmware for Samsung Galaxy S22
You can download Samsung stock firmware from various sources, but the huge problem is the Speed. By using the Frija tool, you can download stock firmware files at high speed.
- Download Latest Frija Tool.
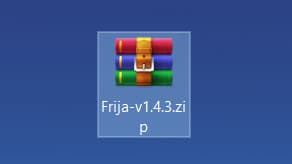
- Extract the zip file to your windows desktop.
- Open the extracted folder and double-click on the
frija.exefile to launch the tool. - We need two things, first your phone’s model number and second, and CSC/regional code.
- You can get your phone model number by going to Settings → About phone.
- To view the CSC code, you can download the “Phone Info SAM“ app.
- Once you have the above information, enter the required data in the Frija tool.

- Finally, click on the Download button.
Step 3: Preparing Patched Boot Image file
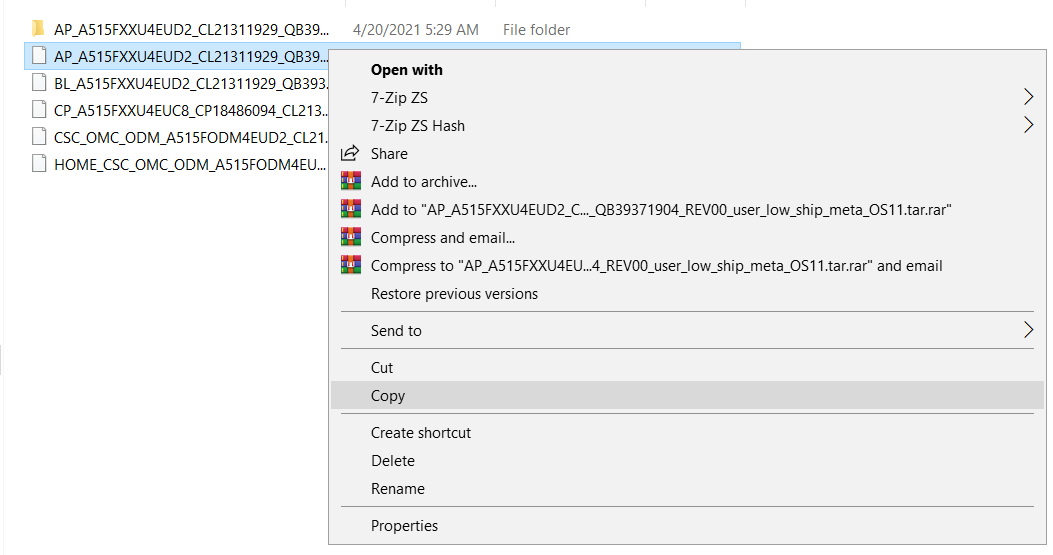
- Extract the downloaded firmware package on your PC.
- Open the extracted folder, and you will see five firmware files in
.tar.md5format.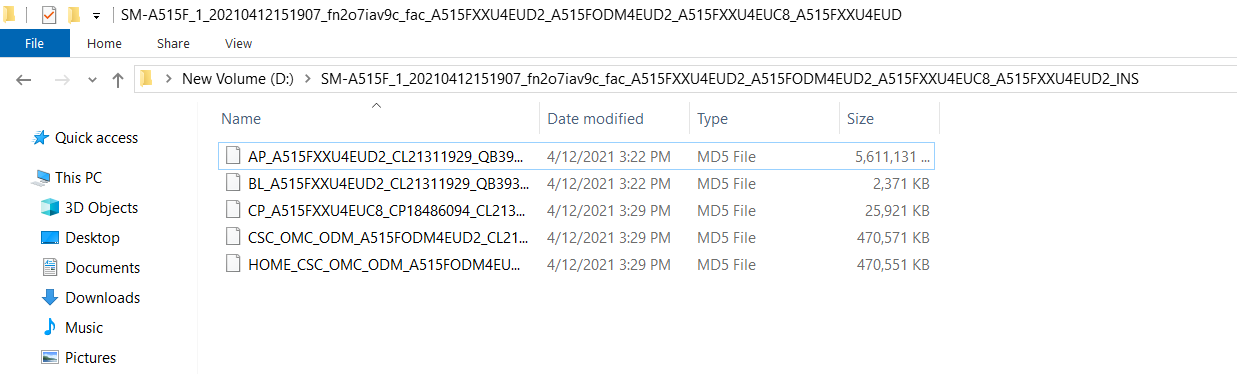
- Right-click on the AP firmware file, hover into the 7-Zip option and select Extract files.
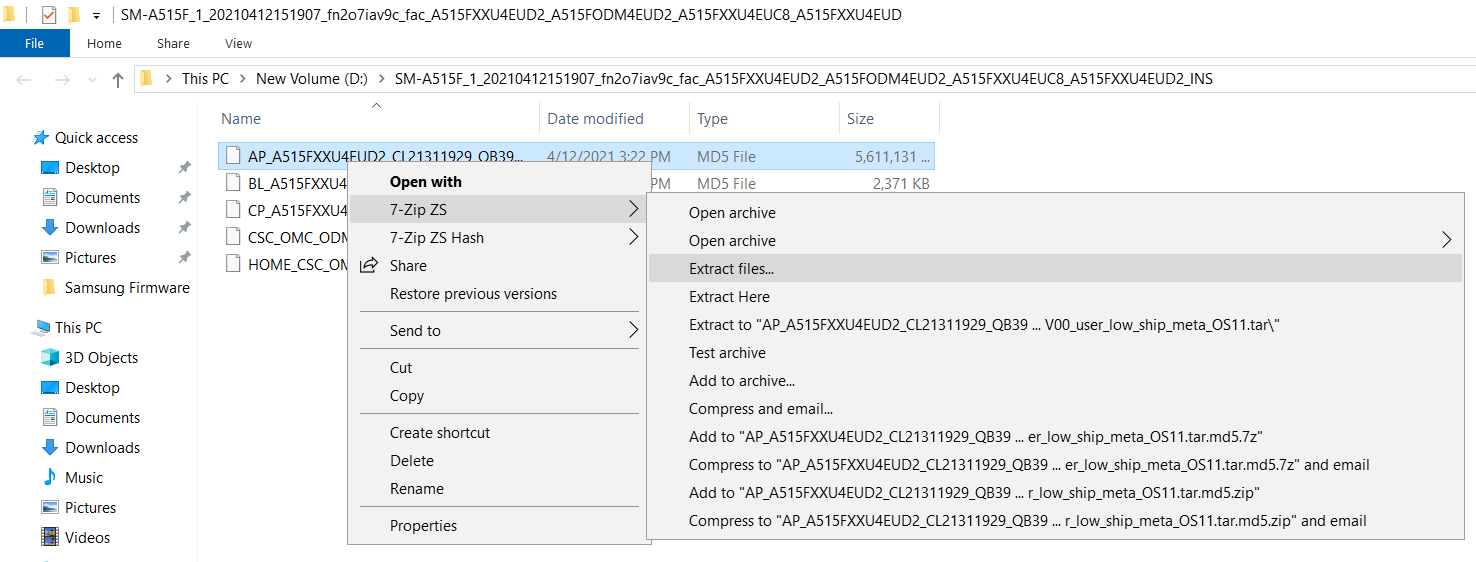
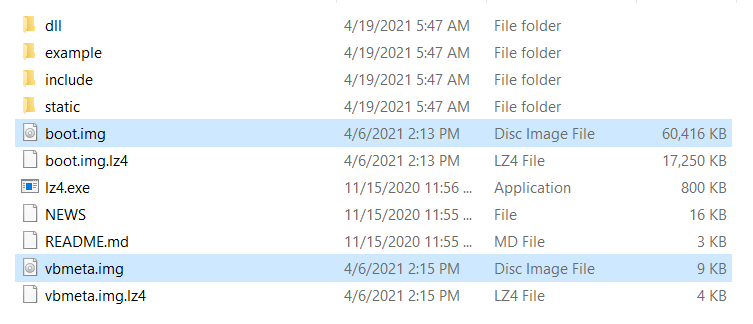
- Now you will find several files along with the
boot.img.lz4andvbmeta.img.lz4.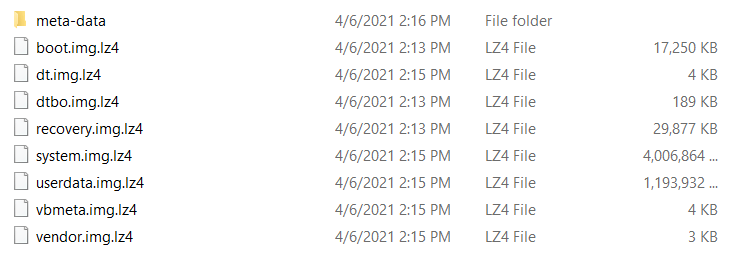
- Copy
boot.img.lz4andvbmeta.img.lz4to LZ4 Installed folder.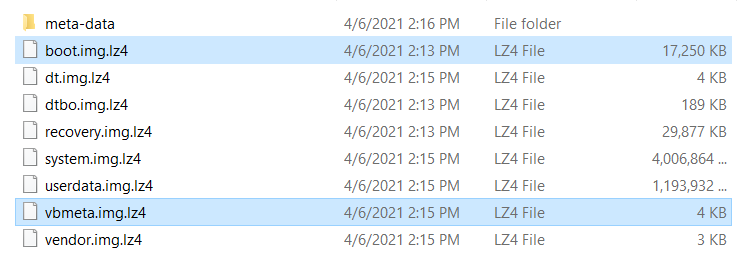
- Next we have to convert .img.lz4 to .img file. To do that, follow the below steps:
- Open the lz4 folder.
- Drag the .lz4 file to the lz4.exe program.
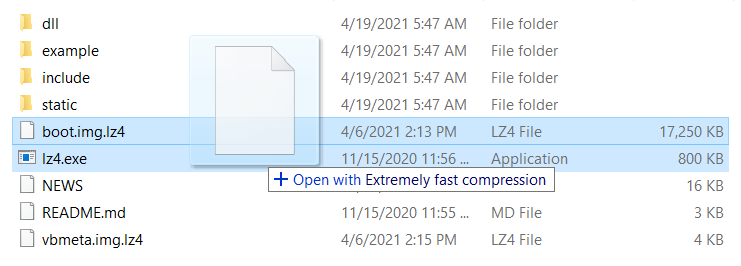
- The script will convert the file to .img format.
- You have to convert all three files one by one.
- Connect Samsung Galaxy S22 device to your PC/Laptop.
- Now copy the “AP” file from the Firmware folder to your phone’s internal storage.
- Now the next step you have to follow on your phone.
Step 4: Patch the AP Firmware File with Magisk App
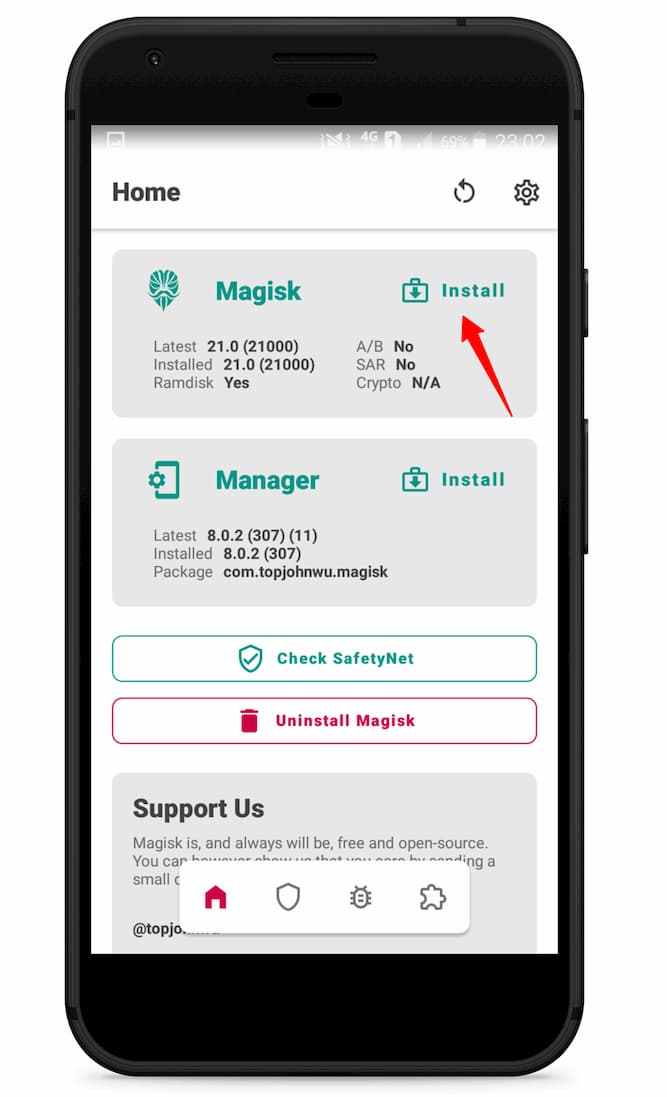
- Download and install Magisk App on your phone.
- Open the Magisk app from the app drawer.
- Tap on the “INSTALL” button.
- Now here, tap on the “Select and Patch a File.”
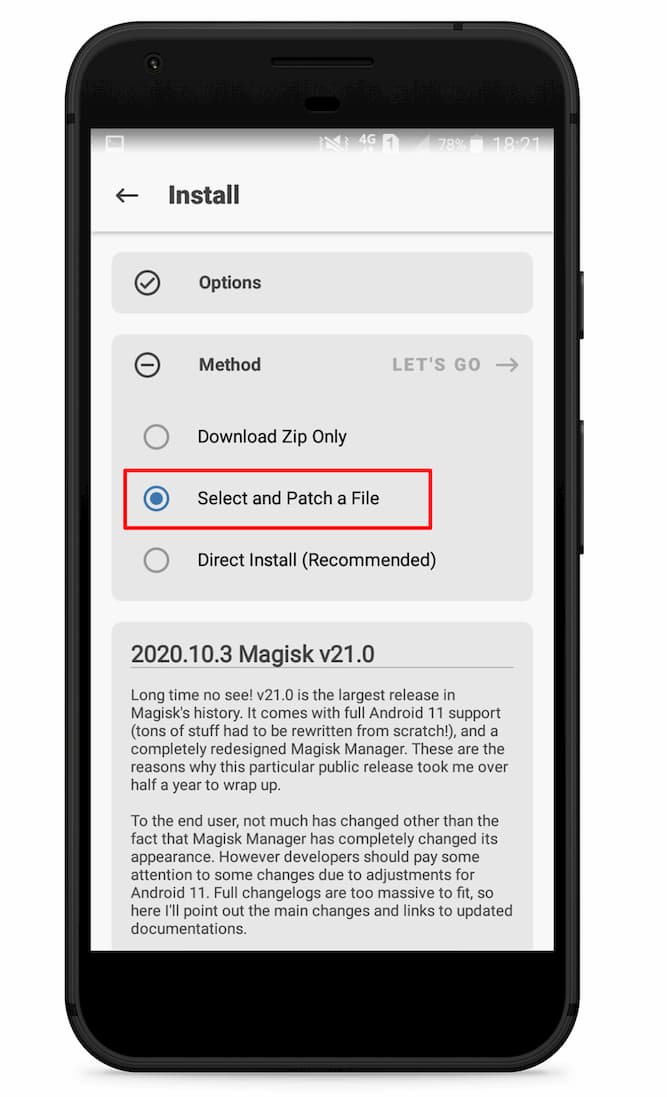
- Navigate to the internal storage and select the AP firmware file that you previously copied to the phone.
- Once the file is selected, tap on “LET’S GO.”
- Wait until Magisk patches the file.
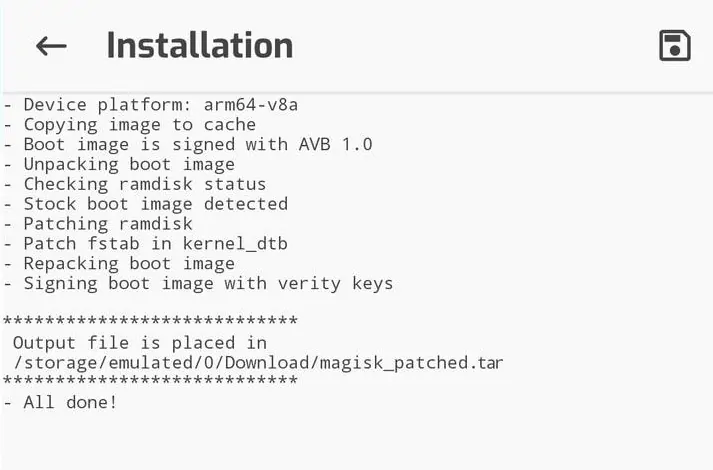
- The patched image file can be found in the “Downloads folder.”
- Now connect your phone to the PC and copy the
magisk_patched.tarfile to the “firmware folder” on your PC.
- Extract
magisk_patched.tarfile. - Now head over to the “LZ4 folder” and copy
vbmeta.imgfile to Magisk Patched folder.
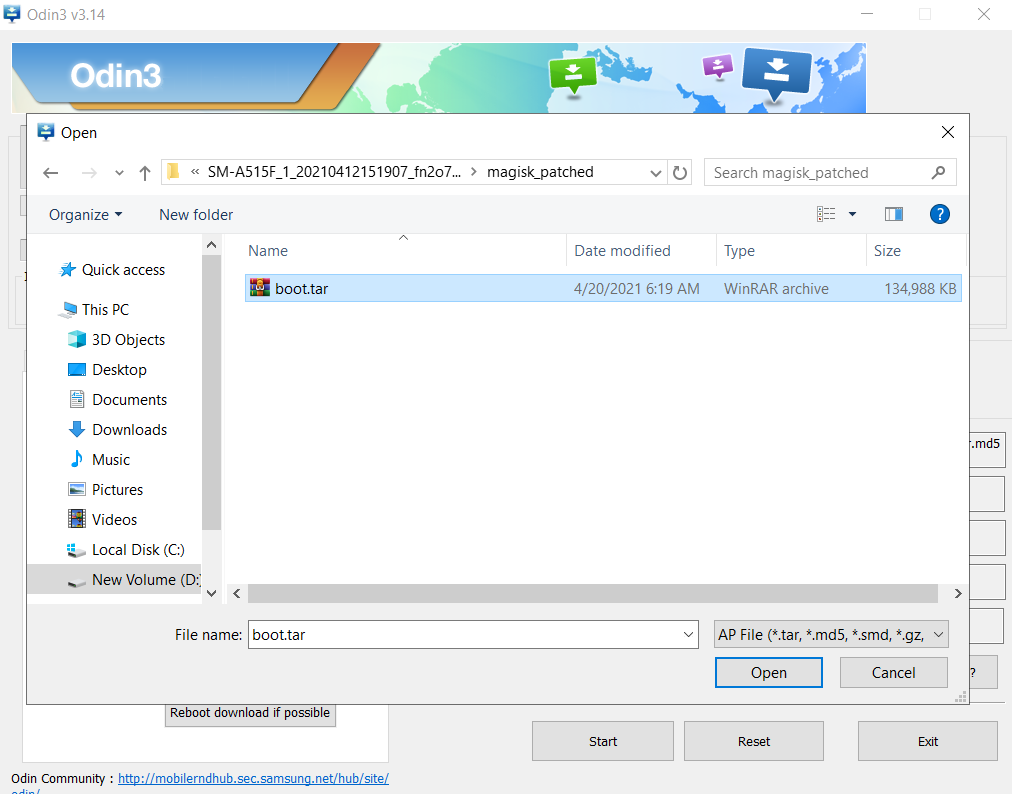
- Select
boot.imgandvbmeta.imgfile, right-click on the files, and “Add to archive.”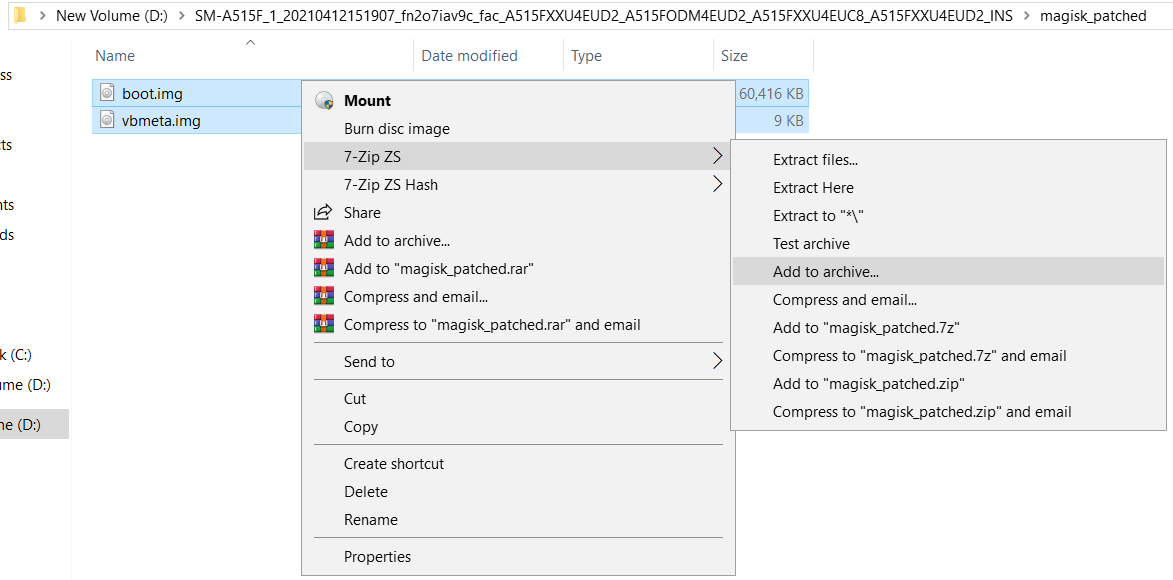
- Select the Archive format to tar and tap on ok.
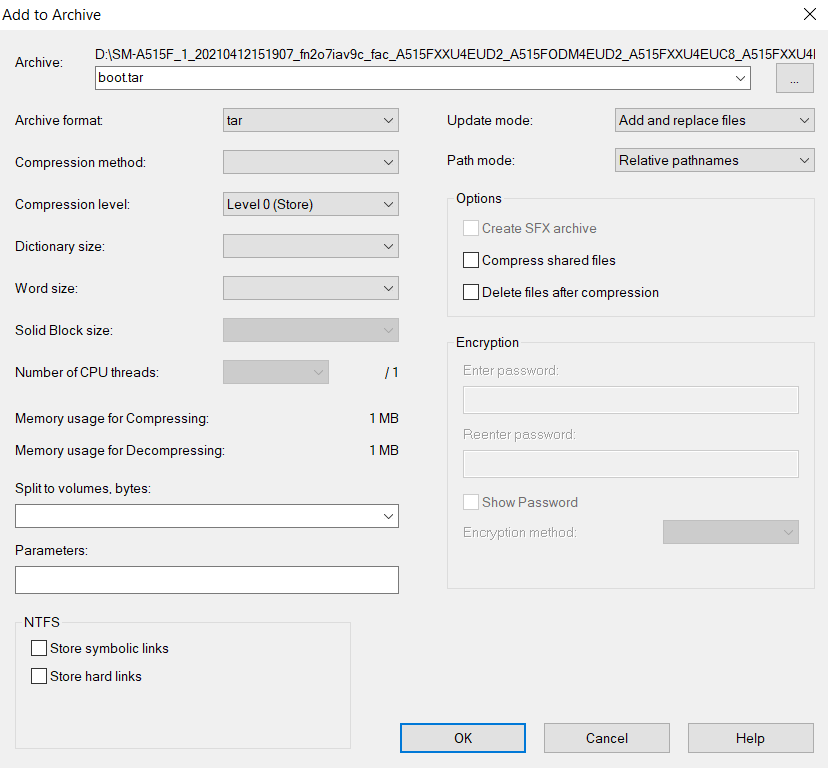
- Now you will see the boot.tar Odin flashable file.

Proceed to the next step.
Step 5: Boot your Samsung Galaxy S22 into Download Mode
- First, power off your Samsung Galaxy S22 device.
- Connect your smartphone to your PC while holding the Volume Down + Volume Up keys together.
- You will now see the Bootloader screen.

- Now press Volume Up key to enter Download Mode.
Step 6: Flash Patched Boot.tar using Odin flash tool
- First, extract the Odin zip file to your desktop.
- Open the extracted folder and run Odin3 xxx.exe file.
- Connect your Galaxy device to a PC/Laptop.
- You will see
ID:COMsection light up blue. It means the PC successfully recognizes your phone.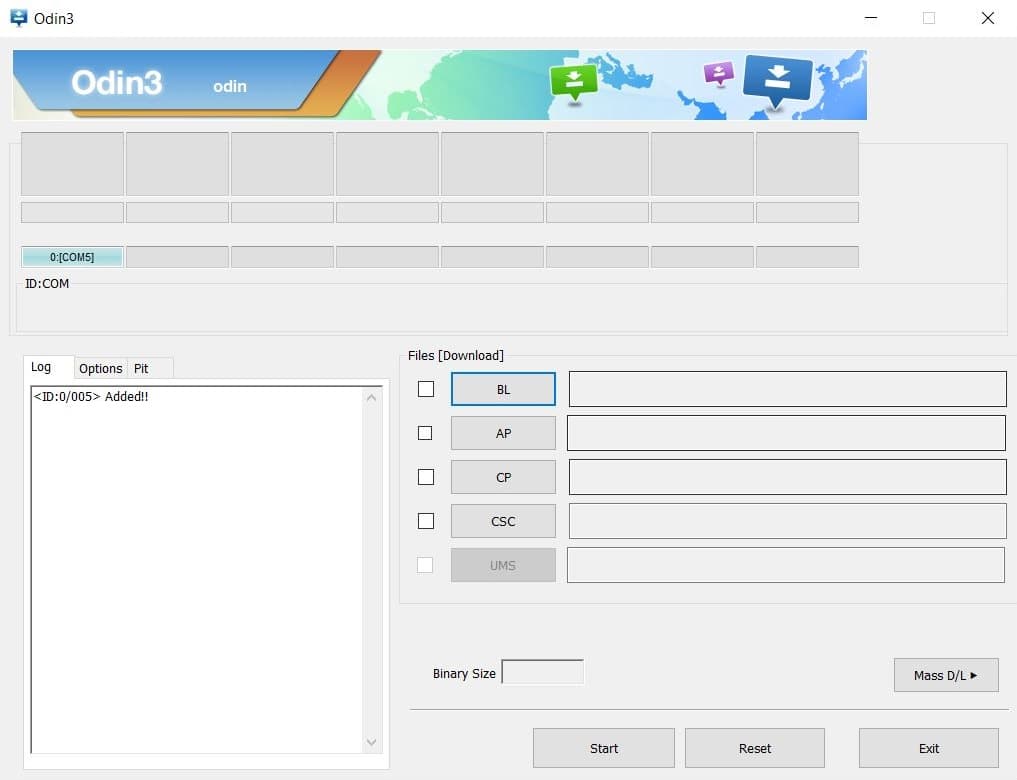
- Click on the following slot buttons and select the corresponding firmware files:
- Tip: For BL, CP, CSC, you have to select files from the “firmware folder.” For AP, you have to select the patched boot.tar file (Check Step 6, 14th step.)
- BL: Select the firmware file starting “BL.”
- AP: Select the Patched AP firmware file (boot.tar)
- CP: Select the firmware file starting “CP.”
- CSC: Select the firmware file starting “HOME_CSC.”
- Once all firmware files are loaded to the Odin tool.
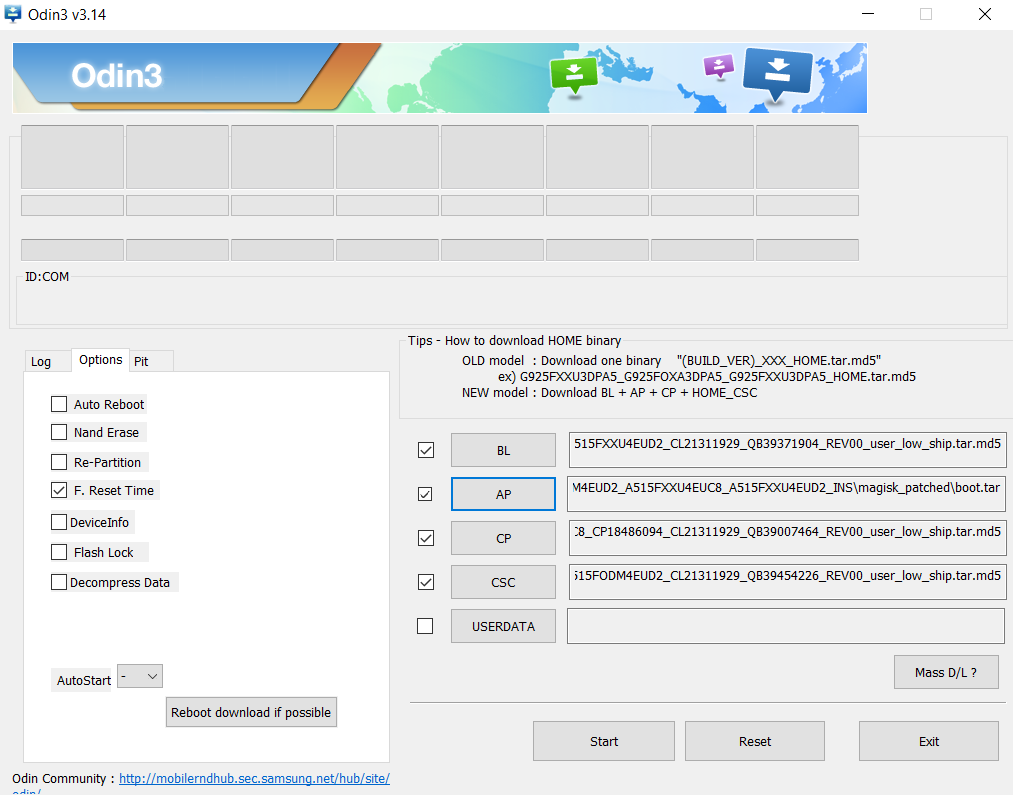
- Make sure to untick the Auto Reboot option under the “Options” tab.
- Once done, finally, click “Start” to begin the flashing process.
- If the flashing is successful, you should see the PASS message on the Odin screen.

- Once the process completes, press the Volume Down + Power keys to exit Download mode.
- As soon as the screen goes black, press the Volume Up + Volume Down + Power keys to boot into Recovery mode.
- Now once the Galaxy A51 boots into stock recovery mode, follow the below steps.
- Go to Wipe data/factory reset. (Use Volume keys to navigate between the options and Power key to select an option.)
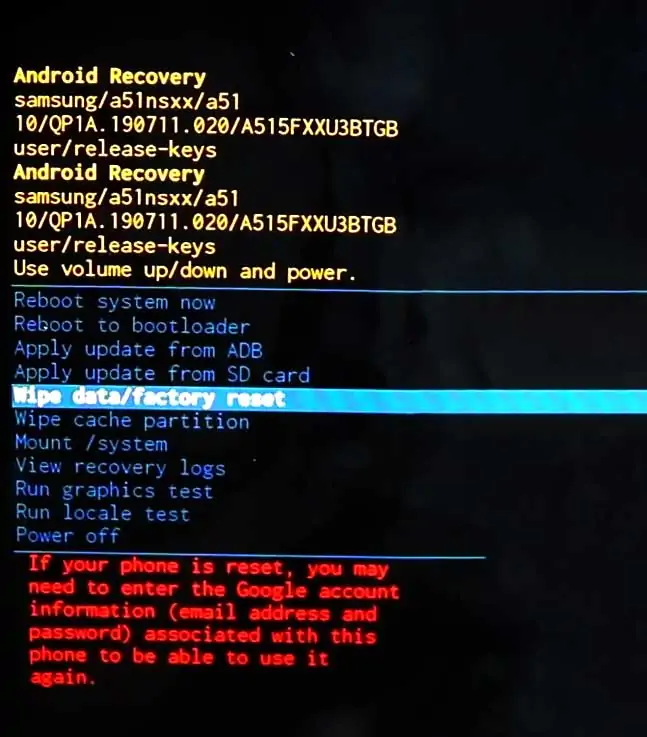
- Select “Factory data reset.”
- Once done, select “Reboot system now.”
- Go to Wipe data/factory reset. (Use Volume keys to navigate between the options and Power key to select an option.)
- The first boot will take some time.
- That’s it! You have successfully rooted Samsung Galaxy S22 using Magisk.
You can also verify if your rooted Samsung Galaxy S22 passes SafetyNet by pressing the “Check SafetyNet” button in Magisk App.

After your device boots up, you will see Magisk App installed on your phone. This app will help you to manage Root permissions, install Magisk Modules, Magisk Hide, and other features.
If you can’t see the app, simply download it from here.
[su_box title=”Related Articles” box_color=”#01B09B” radius=”0″]
- How to Root Samsung Galaxy S21 Ultra
- Root Samsung Galaxy S20 using Magisk
- How to Root Samsung Galaxy A31
[/su_box]
Conclusion
Basically, Magisk is a module that makes root possible with no need for TWRP. In this article, I covered how to Root Samsung Galaxy S21 Series using Magisk without going through all of the trouble with TWRP and then installing SuperSU or another app from the Google Play store.
If you have any questions about this process or want help with it, please reach out to us! We’re here for you every day, so don’t hesitate to get in touch.