In this article, I will be showing you how you can install TWRP recovery on any Android smartphone. By following this guide you will be able to install TWRP recovery on your phone without pc and root.
As you know for rooting an android device the first requirement is the Unlocked Bootloader and then on the second step, you will need TWRP Recovery installed on your phone.
The Stock Recovery that comes preinstalled on our smartphone has very limited features. Like you can’t root or flash files using the stock recovery.
Now if you want to flash Custom ROM or any flashable zip files then you must have a custom recovery installed on your phone. The reason why we use TWRP over other custom recoveries is the simplicity and the availability of the image file.
TWRP is available for almost every android device out there. However, for newly launched phones the availability of TWRP recovery may take some time as per the development. Plus you will see a lot of useful features like taking full Backup of Android, flashing ROMs, Rooting, and much more.
What is TWRP?
TWRP technically stands for “Team Win Recovery Project” Which is an open-source custom recovery image for Android devices. It does require a condition though which is that your phone’s bootloader must be unlocked.
So TWRP is a custom recovery that you need to flash on to your stock recovery to get the most out of your phone. There are more custom recoveries like CWM but they don’t work as well. Flashing TWRP opens up a whole new world of custom ROMS, Mods, Apps that are not officially supported, and much much more.
TWRP does have a touch interface while stock recoveries work without it and are based on volume keys and power buttons. Now on Stock recoveries are extremely limited and wouldn’t allow you to do basically anything they just allow you to flash the stock ROM. While with TWRP you can flash third-party ROMs and mods like Xposed installer and Lineage OS Etc.
Flashing TWRP does void your warranty so if you want that this might not be a way to go. If you remove TWRP and you get back to stock recovery somehow then you might get your phone warranty back.
If you want to take full advantage of TWRP then you must know the advantage and disadvantages of flashing TWRP recovery on your android phone.
Advantages –
- You can Wipe data or Factory reset
- Take full Backup using Nandroid backup
- Fully Restore a Nandroid backup
- You can easily Root your phone using Magisk
- Install apps from your desktop via ADB Sideload
- Easily Mount partitions
- File Manager
Disadvantages –
- Your phone warranty gets void
- Flashing the wrong file may brick your phone
Now that you have learned what is TWRP and its advantage and disadvantage. Let’s quickly proceed to the installation part.
Method 1: Install TWRP Recovery Using ADB & Fastboot (No Root Required)
Before you proceed to the steps make sure to complete the requirements.
Prerequisites –
- Your device Bootloader must be unlocked.
- Download and Install SDK platform tool.
- Enable USB Debugging on your phone.
- Take Full Backup of your phone.
- Fully charge your phone.
Installation –
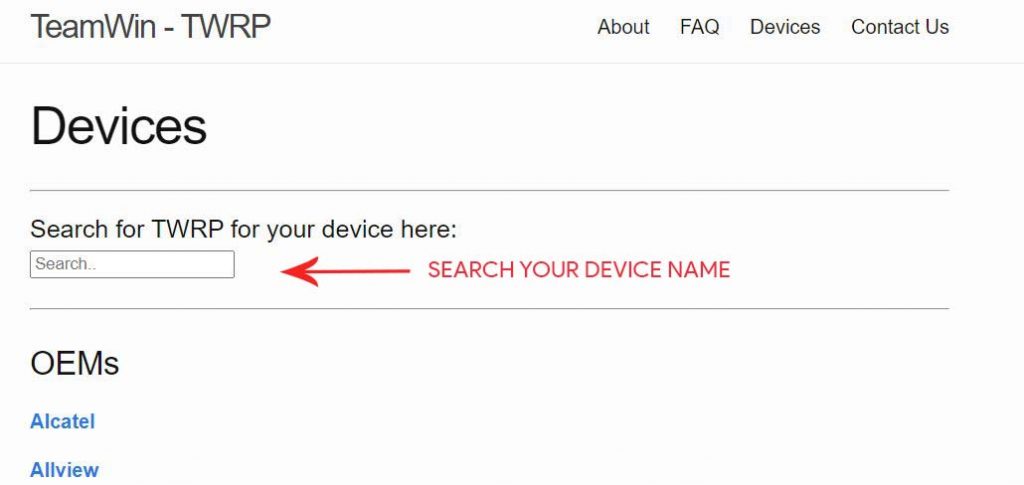
- First, download the TWRP Recovery file from the official website.
- Extract the SDK platform zip file to your desktop.
- Copy the TWRP Recovery .img file to the SDK platform folder.
- Rename the recovery file to twrp.img.
- Now type “cmd” in the address bar of the SDK platform folder and Hit Enter.

- A command window will open.
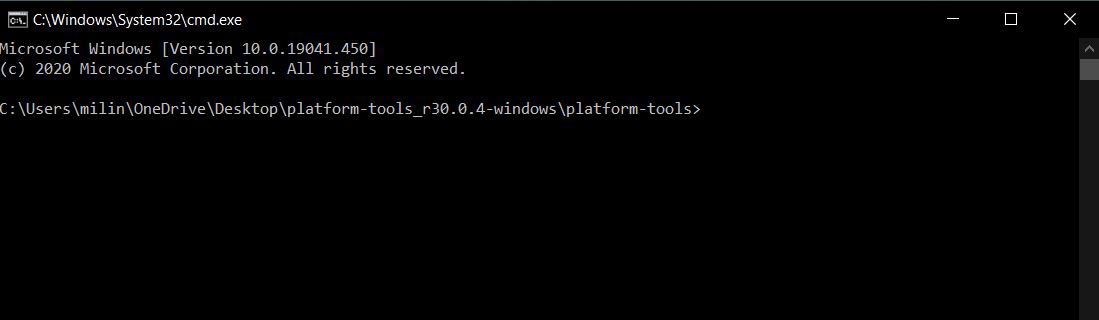
- Connect your smartphone to PC/Laptop and type the following command. (If you see any permission popup on your phone then allow it)
adb reboot bootloader
- The above command will boot your phone into bootloader/fastboot mode.
- Once the device boots into bootloader mode, type the below command.
fastboot flash recovery twrp.img
- Once the TWRP is successfully flashed on your phone, type the last command to reboot your device.
fastboot reboot
- That’s all. TWRP recovery is installed on your device.
Method 2: Install TWRP Recovery On Samsung Phones
The below steps are applicable only for Samsung phones. So, do not try the below steps of any other smartphones other than Samsung phones. Also, make sure to read the requirements before applying the steps.
Prerequisites –
- Download Odin Tool on your PC/Laptop.
- Download TWRP Recovery file for your Samsung phone. (Make sure to download .tar file)
- Take a complete backup of your smartphone.
- Fully charge your phone.
Flashing the TWRP Recovery using Odin –
- First, enable OEM Unlock on your phone. Go to Settings > About Phone > Tap on Build Number 6-7 times. This will enable developer options on your phone.
- Again Go back to Settings > Developer Options > enable OEM Unlock and USB Debugging.
- Now Reboot your phone into Download mode.
- Power Off your phone.
- Next, press and hold the “Home + Power + Volume down” button until you see a warning screen.
- Press the Volume Up button to enter into the Download Mode.
- Once done, connect your Samsung phone to the PC/Laptop via the original USB cable.
- Now on your PC extract the Odin zip file to your desktop.
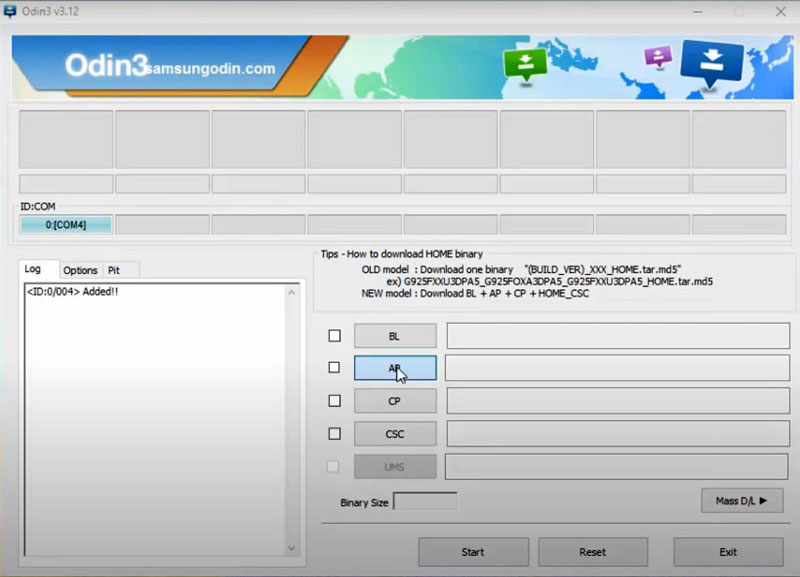
- Open the extracted folder and run Odin3 xxx.exe file.
- Click on the AP tab option and select the TWRP recovery file. (Again make sure that the recovery is a .tar file, or else it may cause some problems.)
- Go to options and uncheck Auto Reboot option.
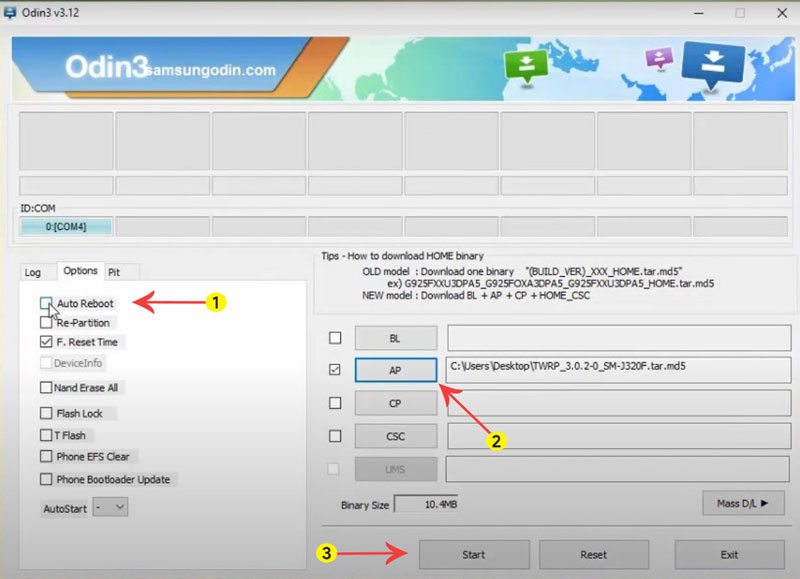
- Now Tap on Start button and wait for a few minutes.
- Once completed, you see the PASS message on the Odin screen.
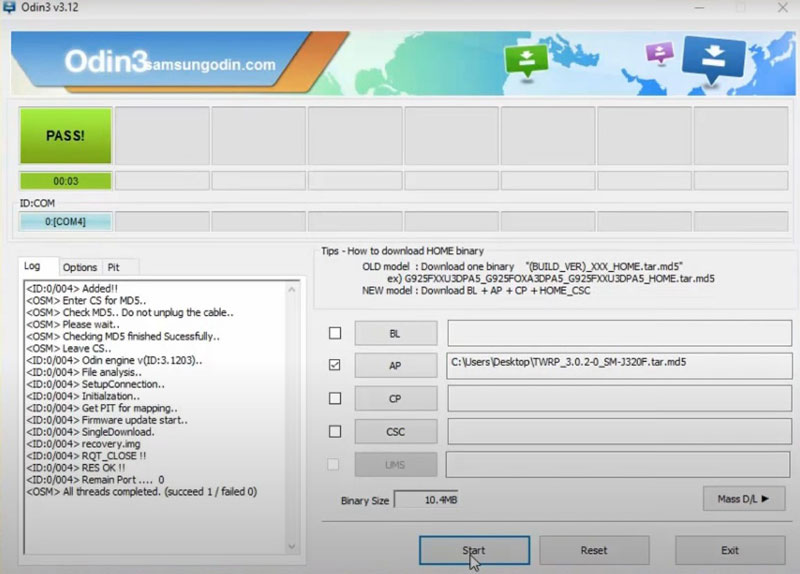
- That’s it you have successfully flashed TWRP recovery on your Samsung phone.
You can now Boot your Phone into TWRP Recovery by press & hold Home + Power + Volume Up button until you see the Samsung logo on the screen, release all the buttons and your device will boot into TWRP Recovery Mode.
This was the official guide on how to install TWRP recovery on Samsung devices. Now you can flash Custom ROM, Root your phone, Stock ROM’s, etc.
[su_note note_color=”#3f51b5cc” text_color=”#ffffff” radius=”0″]Now that you have successfully installed custom TWRP recovery on your phone, you can go further to Root your device using Magisk. [/su_note]
Conclusion –
So, in this guide, we have included everything you need to know about what is TWRP, its advantages, disadvantages, and the installation process. I hope you find this guide helpful.
If you have any questions or facing errors while applying the steps then you can leave a comment. We will try to resolve your problems as soon as possible.