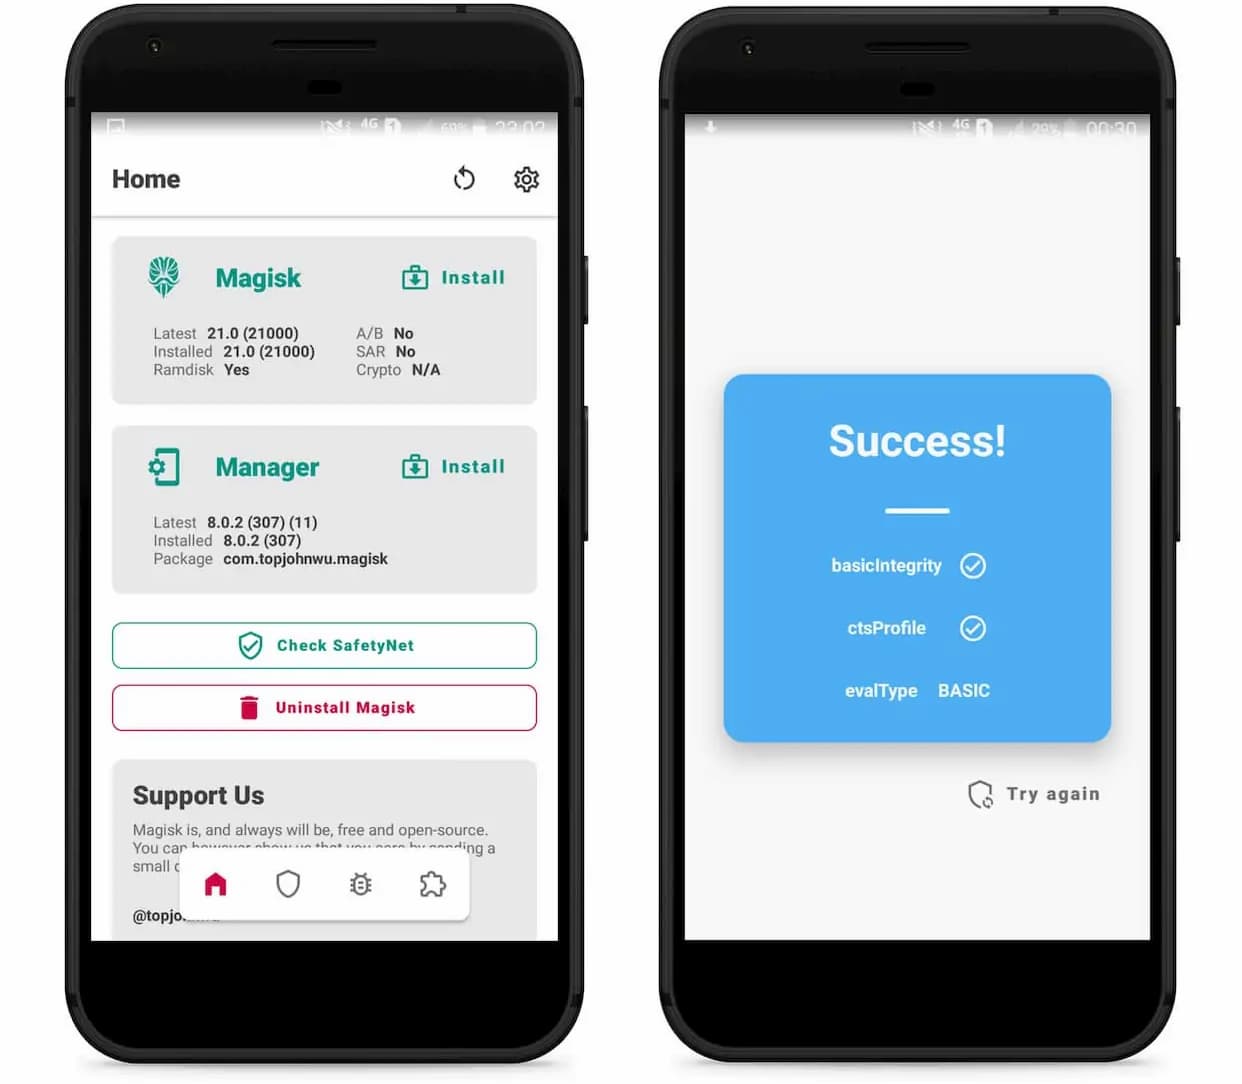
This tutorial will show you how to Root Samsung Galaxy J3 Pro 2017 running on Android Pie. This method works with all android versions and is a simple process that anyone can do without much knowledge about rooting.
The best part of this tutorial is that it uses TWRP recovery which means your data will not get wiped during the process. You don’t have to worry about losing any data or settings while rooting your device using this method. All you need is a computer, USB cable, and a few minutes of time from you!
About Samsung Galaxy J3 Pro 2017
Samsung Galaxy J3 Pro (2017) is a mid-range smartphone that offers a premium look and feels. It has an elegant metallic frame, which makes it sturdy and durable.
The device comes with the Android 7.0 Nougat operating system and features a Quad-core processor for faster performance. You can enjoy seamless multitasking on the device as it has 2GB of RAM.
It has a 5MP front camera and 13MP rear camera with LED flash to capture high-quality pictures even in low light conditions. The Samsung Galaxy J3 Pro (2017) supports memory expansion up to 128 GB via a dedicated SD card slot to keep all your favorite multimedia content.
Steps to Root Samsung Galaxy J3 Pro 2017 using TWRP Recovery
Below I have shown step by step procedure to Root Samsung Galaxy J3 Pro. You have to follow every step carefully, or else you may face trouble booting up your device again.

Please read the complete guide before applying the steps. This will avoid confusion.
Things to remember
- Make sure to disable all security Locks on your Samsung Galaxy J3 Pro.
- Take Full Backup of your Android device.
- You need a PC to perform the Commands.
- Fully charge your phone.
- Samsung Galaxy J3 Pro Original USB Cable.
Note: Rooting is a complex process, so if you miss any of the below steps will end up bricking your device. So, make sure to follow all the steps carefully as shown.
We are not responsible for any loss and damage to your device. Apply the below steps with your own risk.
Step 1: Enable Developer Option and OEM Unlock on Samsung Galaxy J3 Pro 2017
- First, we need to enable Developer Options on Samsung Galaxy J3 Pro.
- Go to “Settings” on your Samsung Galaxy J3 Pro.
- Scroll down to the very bottom of the screen and select “About phone.”
- Tap on the “Build number” 5-6 times.
- You will now see the
"Developer mode has been enabled!"toast message on the screen.
- The next thing we need to enable is the OEM unlocking option on Samsung Galaxy J3 Pro.
- Again head over to Settings → Developer options → toggle ON the OEM unlocking option.
- Next select “Enable” when prompted to confirm.
Downloads
In any steps, if the particular file is asked you to download, then you can come here and download it. We will update the links according to the latest build by developers.
- Download Magisk App (Latest Version) [Phone]
- Samsung USB Drivers (Optional) – Download [PC]
- Odin Flash Tool (Latest) – Download [PC]
- RMM State Bypass – Download [Phone]
- no-verity-opt-encrypt – Download [Phone]
- TWRP Recovery for Samsung Galaxy J3 Pro – Download [PC]
Step 2: Boot your Samsung Galaxy J3 Pro 2017 into Download Mode
- Next, power off your Samsung Galaxy J3 Pro device.
- Connect your smartphone to your PC while holding the Volume Down + Home + Volume Up keys together.
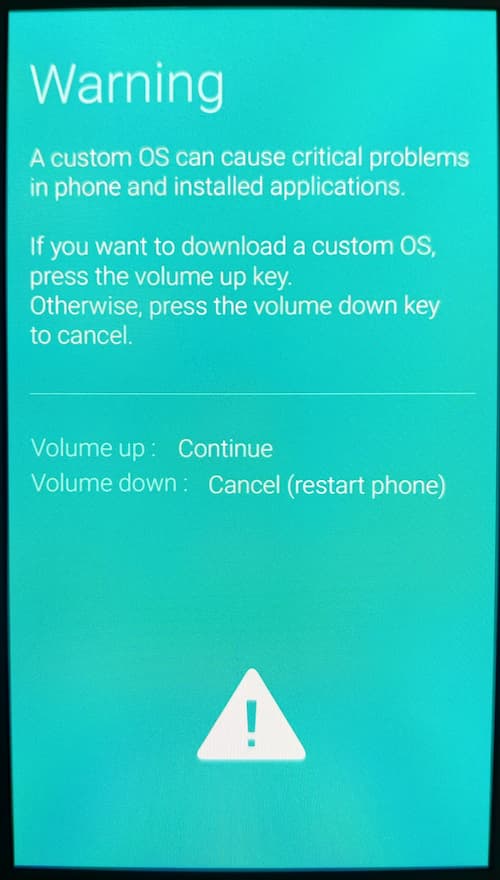
- You will now see the Bootloader screen.

- Now press Volume Up key to enter Download Mode.
Step 3: Flash TWRP on Samsung Galaxy J3 Pro 2017 using Odin flash tool
- First, extract the Odin zip file to your desktop.
- Open the extracted folder and run Odin3 xxx.exe file.
- Connect your Galaxy device to PC/Laptop.
- You will see
ID:COMsection light up blue. It means the PC successfully recognizes your phone.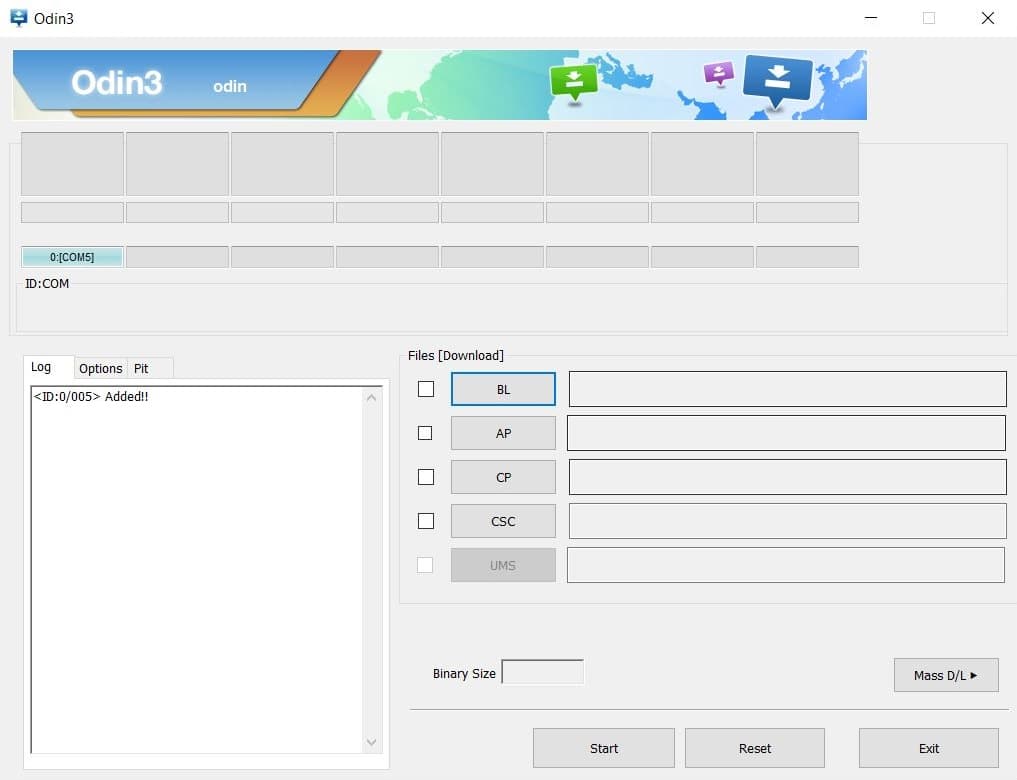
- Click on the AP tab option and select the TWRP.tar file.
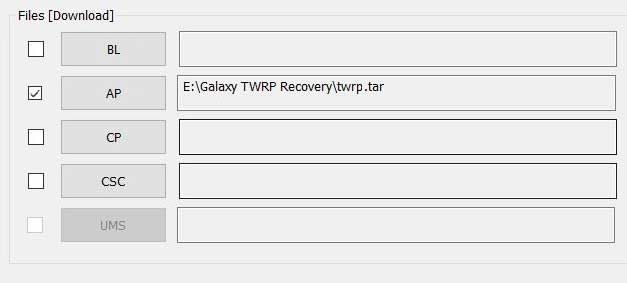
- Head over to the “Options” tab and untick the Auto Reboot option.
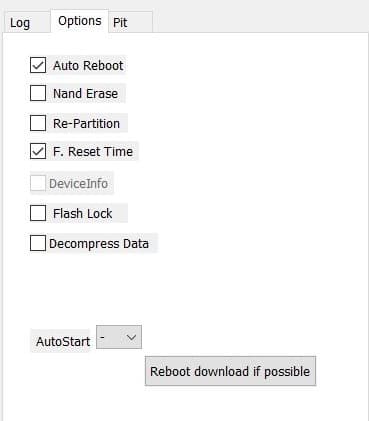
- Once done finally, click “Start” to begin the flashing process.
- If the flashing is successful, you should see the PASS message on the Odin screen.

- Once the process completes, press the Volume Down + Power keys to exit Download mode.
- That’s it you have successfully flashed TWRP recovery on your Samsung Galaxy J3 Pro smartphone.
You can now Boot your Samsung Galaxy J3 Pro into TWRP Recovery by press & hold the Volume Up + Volume Down + Power for few seconds and your device will boot into TWRP Recovery Mode.
Step 4: Root Samsung Galaxy J3 Pro 2017 using Magisk
Now we are finally ready to flash the Magisk zip file on the Samsung Galaxy J3 Pro.
- On the TWRP recovery page, Select Wipe → Advanced Wipe → Select Cache and User Data.
- Go back to TWRP home select Install.
- Locate the no-verity-opt-encrypt.zip file and select it.
- Next, Swipe to confirm Flash.
- Return to Home of TWRP select Install.
- Locate the RMM_Bypass.zip file and select it.
- Again go back to TWRP home select Install.
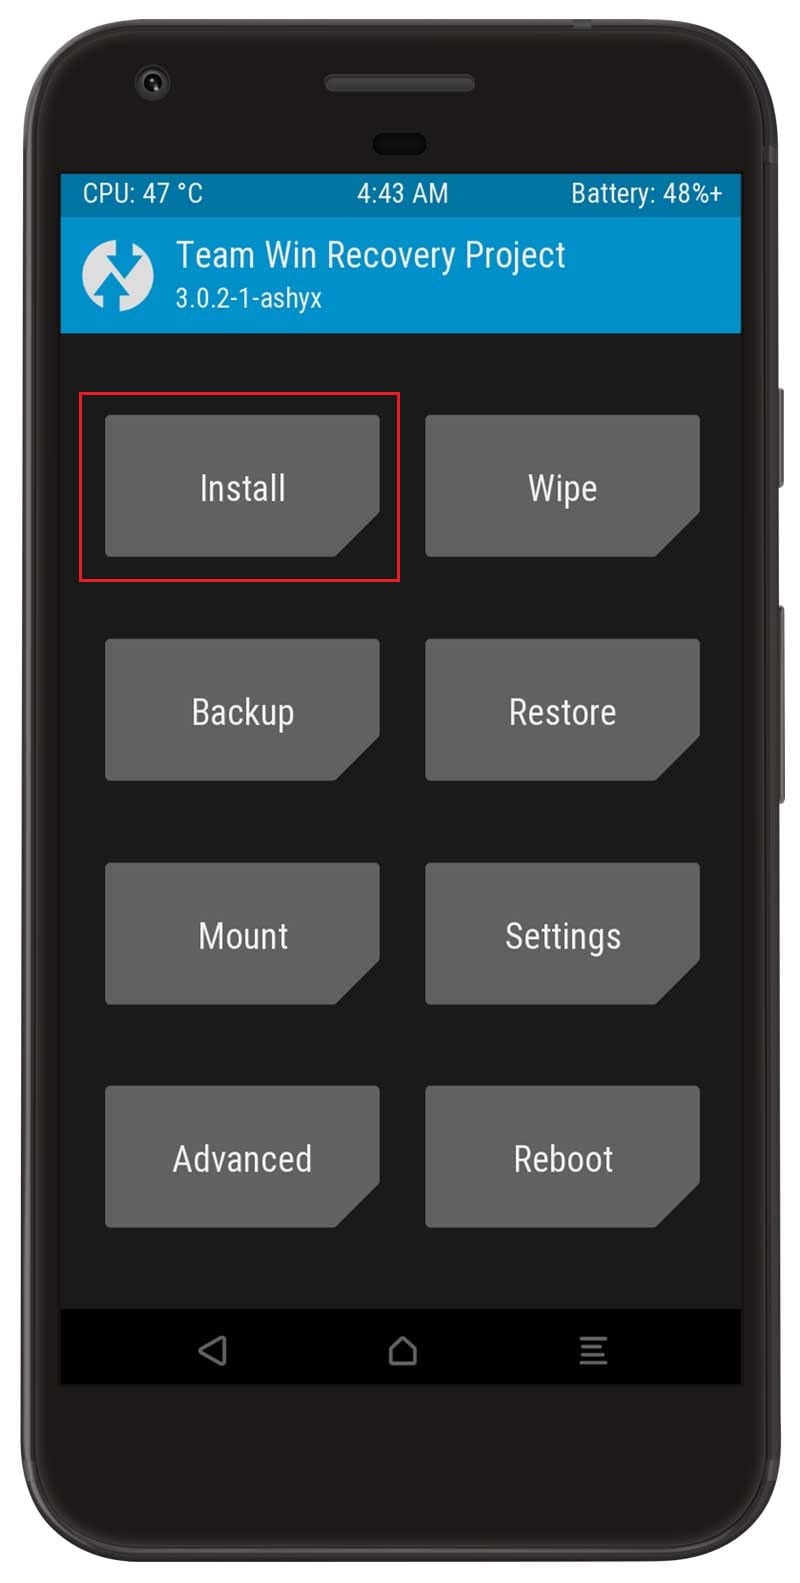
- Locate the Magisk zip file and select it.
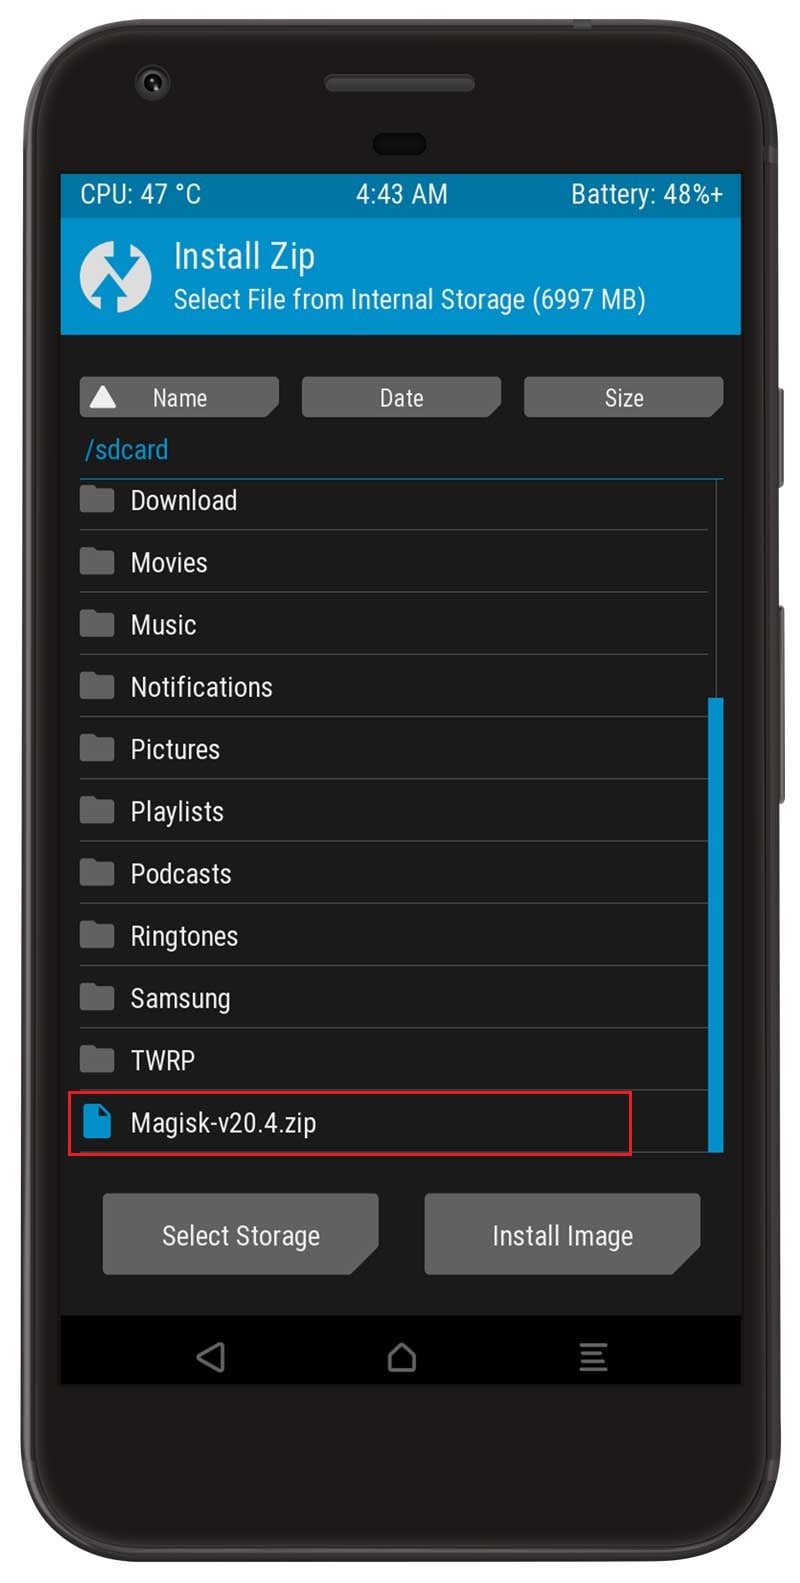
- Next, Swipe to confirm Flash.
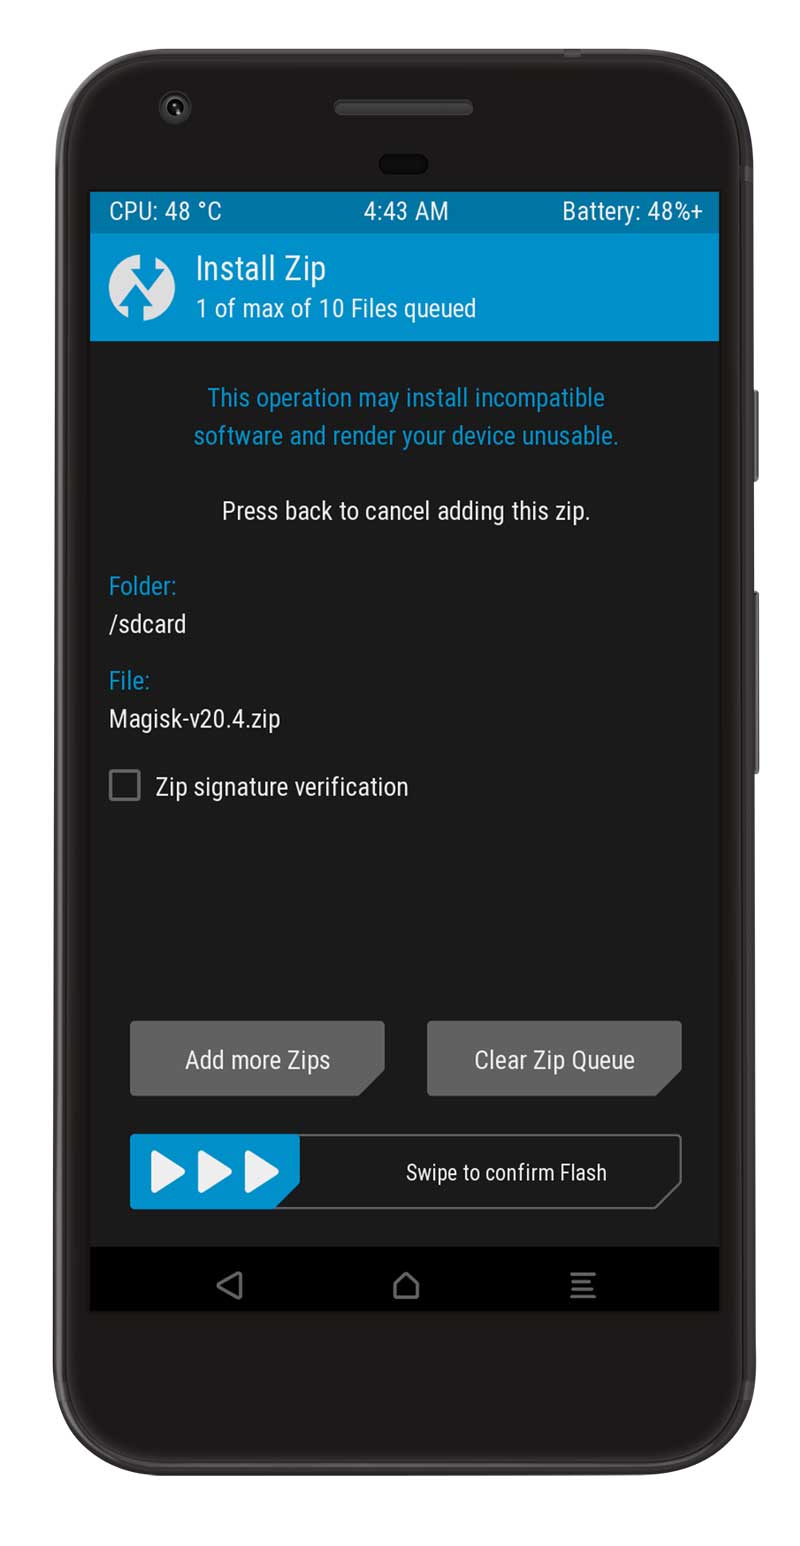
- Once the flashing process completes tap on the Reboot system.
- That’s it, you have successfully rooted your Samsung Galaxy J3 Pro device.
You can also verify if your rooted Samsung Galaxy J3 Pro passes SafetyNet by pressing the “Check SafetyNet” button in Magisk App.
After your device boots up, you will see Magisk App installed on your phone. This app will help you to manage Root permissions, install Magisk Modules, Magisk hide feature, and much more.
If you can’t see the app, simply download it from here.
Here are some recommended Magisk Modules that you must try on your Samsung Galaxy J3 Pro smartphone.
[su_box title=”Related Articles” box_color=”#01B09B” radius=”0″]
- How to Root Samsung Galaxy A31
- Root Samsung Galaxy A70s using Magisk
- How to Root Samsung Galaxy M51 using Magisk
- Root Samsung Galaxy S20 Plus without TWRP
- How to Root Samsung Galaxy F41 using Magisk
[/su_box]
Wrapping Up –
This article has explained how to root Samsung Galaxy J3 Pro 2017 using TWRP & Magisk (Android Pie). I hope you’ve found the information helpful. If not, please let me know below in the comments section or on social media! Thanks for reading and remember that if you need help with any of these steps, our team is happy to assist.
